touch screen based remote controlled robot with wireless video camera pdf

Tài liệu Build a Remote Controlled Robot doc
Ngày tải lên :
11/12/2013, 15:15
... system.
R
EMOTE
C
ONTROL
S
YSTEM
The ability to remotely control your robot is a big part of its
appeal. The two types of remote control are wired and wireless.
Basically, what you are doing with either system is tripping
switches ... A
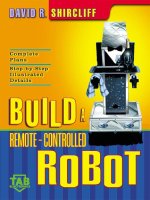
REMOTE-
CONTROLLED
ROBOT
remote control system, as are the rest of the parts, is a standard
off-the-shelf item.
At this point, you should read through the book to famil-
iarize yourself with ... now ready to enter the fascinat-
ing world of robotics.
ROBOT BASICS
But first, a review of the basics.
The construction of a remote- controlled robot, while not
easy, need not be difficult. My...
- 145
- 351
- 0

Tài liệu McGraw Hill-Build a Remote Controlled Robot docx
Ngày tải lên :
25/12/2013, 19:15
... timer -controlled video cassette recorder, with-
out conjuring up the popular Star Wars notion of robots.
A second, more-precise definition is stated by the Robot
Institute of America. It reads: “A robot ... your robot will be
used as a test bed for other robotics projects. If you are like
me, once you build your own robot, you’ll always be trying to
improve it.
David R. Shircliff
x
P
REFACE
remote ... ready to enter the fascinat-
ing world of robotics.
ROBOT BASICS
But first, a review of the basics.
The construction of a remote- controlled robot, while not
easy, need not be difficult. My motto...
- 145
- 438
- 0

BUILD A REMOTE CONTROLLED ROBOT potx
Ngày tải lên :
27/06/2014, 18:20
... beginning
robot builder, however, this is the best system to start out with.
It will allow you to build and test systems for your robot with-
out the complexity and expense of a wireless system.
Wireless ... CONTROL SYSTEM
The ability to remotely control your robot is a big part of its
appeal. The two types of remote control are wired and wireless.
Basically, what you are doing with either system is tripping
switches ... now ready to enter the fascinat-
ing world of robotics.
ROBOT BASICS
But first, a review of the basics.
The construction of a remote- controlled robot, while not
easy, need not be difficult. My...
- 145
- 333
- 0
Build A Remote-Controlled Robot Part 1 ppsx
Ngày tải lên :
10/08/2014, 01:22
... A
REMOTE-
CONTROLLED
ROBOT
CHAPTER FOUR. REMOTE CONTROL SYSTEM 53
Motherboard 57
Wiring the Motherboard 60
Completing the Motherboard 62
Installing and Wiring the Motherboard 63
Using the Remote ... interest in robots leaned more toward the popular con-
cept of robots as humanlike friends and servants. I did not
have the technical skill or funds to build a computer -controlled
robot, so I ... to build robots at home began to appear.
These books, however, were very technical, showing how to
build computer -controlled mobile platforms that are consid-
ered by most to be true robots.
My...
- 10
- 289
- 0
Build A Remote-Controlled Robot Part 2 pps
Ngày tải lên :
10/08/2014, 01:22
... timer -controlled video cassette recorder, with-
out conjuring up the popular Star Wars notion of robots.
A second, more-precise definition is stated by the Robot
Institute of America. It reads: “A robot ... now ready to enter the fascinat-
ing world of robotics.
ROBOT BASICS
But first, a review of the basics.
The construction of a remote- controlled robot, while not
easy, need not be difficult. My ... robot? ” The word robot comes
from the Czech word Robota, which means obligatory work or
servitude. The word robot was first used in a Czech play called
R.U.R. (Rossum’s Universal Robots) by Karl...
- 10
- 291
- 0

Build A Remote-Controlled Robot Part 4 doc
Ngày tải lên :
10/08/2014, 01:22
... supplies the robot with
mobility, but contributes to its personality and appeal.
Although simple in construction, the platform outlined in this
chapter is capable of carrying 50 pounds of robot. To ... method.
FIGURE 1-5. Completed motorized wheel.
xxx
FIGURE I-21.
Can you name this robot? (
Courtesy of American Robots.)
have a strong vise, don’t attempt to drill the holes yourself.
A local ... out, four small spacing washers, two red plastic and two
metal, will fall from the frame along with the wheel itself and
the wheel’s large white driver gear.
1
CHAPTER
ONE
Copyright 2002 The...
- 10
- 252
- 0

Build A Remote-Controlled Robot Part 5 ppt
Ngày tải lên :
10/08/2014, 01:22
... works for small adjustments. With the bolt
inserted you can now mark and drill the other holes starting
with the hole in the opposite corner from the bolt. (If you
started with the bottom left hole, ... nuts from
coming loose due to vibration caused when the robot travels
over rough surfaces. You should use lockwashers throughout
your robot. Also Fig. 1-9 shows the use of a large bore washer.
This ... is very easy
to work with (especially on a flat surface) so if you follow the
directions on the package, you should have no problems. If
you do use fiberglass, use a kit with a clear resin so...
- 10
- 232
- 0

Build A Remote-Controlled Robot Part 6 pot
Ngày tải lên :
10/08/2014, 01:22
... guide.
BODY FRAMEWORK 19
that piece. The figures depict each piece as if it were laid
lengthwise with its two edges on a workbench then flattened
so both sides could be seen. All the figures show...
- 10
- 290
- 0

Build A Remote-Controlled Robot Part 7 pps
Ngày tải lên :
10/08/2014, 01:22
... vacuum and framework
and drill the holes. Replace the framework with the vacuum
cleaner inside, and bolt both in place. Press the bolts with
washers in place through the bottom of the platform, then
Now ... The rivet gun you use should come with directions.
Once you have completed both the upper and lower sec-
tions of the framework, they must be joined together with two
20-inch connection pieces ... (which stand for
front) on the front of this section face you. Then place the upper
section within the lower, with its Fs facing you. Figure 2-27
shows where the two connecting pieces are placed; the...
- 10
- 209
- 0

Build A Remote-Controlled Robot part 8 ppsx
Ngày tải lên :
10/08/2014, 01:22
... Crimp kit
4 Small electrical twist caps
robot to be wired together with great ease; they also allow you
to remove individual components from the robot without
disturbing others. Most of Questor’s ... sitting
in their correct mounting positions. Then place two more alu-
minum pieces, with their mounting holes flush with the robot s
platform, snug against the battery. Place one piece against the
front ... could turn the robot
upside down and the batteries will remain in place.
The next step in providing Questor with power is to mount
multipost barrier strips at various points on the robot s plat-
form....
- 10
- 232
- 0

Build A Remote-Controlled Robot part 9 doc
Ngày tải lên :
10/08/2014, 01:22
... experiment with
the robot s control and refamiliarize yourself with the rest of the
book. The next chapter details Questor’s remote control system.
If you do not plan to include a remote control ... give you an understand-
ing of remote control systems.
52 CHAPTER THREE
54 CHAPTER FOUR
FIGURE 4-1. Three-channel remote control system.
FIGURE 4-2. Leaf switch.
REMOTE CONTROL SYSTEM 55
The switches ... a remote control system with more than two
channels, you can use the other servos to trip leaf switches for
turning other devices on or off, or control motors (forward,
stop, and reverse) within...
- 10
- 211
- 0

Build A Remote-Controlled Robot part 10 pptx
Ngày tải lên :
10/08/2014, 01:22
... up for forward, center for off, and down for
reverse, along with their combinations, dictated the direction
of the robot. With the remote control system, the control
sticks on the transmitter ... you use
the remote control system, a small price to pay for wireless
control. As I noted before, if your remote control system has a
third channel and thus a third servo, you could remotely con-
trol ... switch gets the
power to control two on/off functions in the robot. (The nega-
tive or black wire forms the function being controlled; in my
robot a horn is wired directly to the positive power grid.)
There...
- 10
- 208
- 0

Build A Remote-Controlled Robot part 11 ppt
Ngày tải lên :
10/08/2014, 01:22
... Mounting holes for the arm.
robot s final assembly to protect it from damage. The head
lights when a button (that should come with the auto dome
light kit) mounted on the robot is pushed. Questor’s ... to the end-cap
with a 1/8-inch screw. Figure 5-9 shows a completed hand.
After you have made the hands, set them aside; they will be
attached to the robot s arms later during the robot s final
assembly. ... eight-foot
ARMS AND SUBSYSTEMS 69
again with that on the frame, bolt it in place using a 1-inch ϫ
1/4-inch-diameter bolt, nut, and lockwasher set. Do the same
with the mounting hole on the lower...
- 10
- 313
- 0

Build A Remote-Controlled Robot part 12 docx
Ngày tải lên :
10/08/2014, 01:22
... installed systems that make
the robot function and appear as a butler, true to his robot ser-
vant theme. Also in this section you’ll paint the metal skin and
add the robot s serving tray. Before ... button mounted on the robot s wrist will also have to
be soldered with two wires running the length of the arm,
one that runs down the framework to the barrier strips on
the remote control board.
After ... metal skin panels cover all of the robot s body except
for the rear of the upper framework and the top of the lower
framework. These openings will be covered with utility panels
which, when removed,...
- 10
- 267
- 0

Build A Remote-Controlled Robot part 13 pdf
Ngày tải lên :
10/08/2014, 01:22
... is
devoted to adding items to spruce up the robot s appearance.
Also, if you have purchased an RC system with a third channel,
you will be adding a horn that is controlled by the system’s
third servo.
94 ... recharge
plugs for the remote control system. The on/off switch is
mounted at the lower edge of the right side panel of the upper
framework. Follow the mounting directions that come with
the RC system ... type of metal
tab system used for the rear panel. In this case, however, you
SKIN AND FINISHING TOUCHES 89
FIGURE 6-4. Completed rear access panel.
later in this chapter. Also note the rubber...
- 10
- 171
- 0


