canon digital ixus i manual

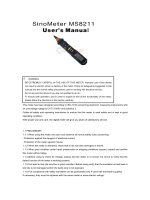
Sinometer-MS8211-Digital-Multimeter-User-Manual
Ngày tải lên :
05/03/2013, 13:43
... MS8211
⑵
Test
Clip:ElectricRatings600V10Aonepiece
⑶Battery:1.5V,AAAtwopieces
⑷InstructionManualonepiece
RangeResolutionFunction
0.001VDisplay:readapproximateforwardvoltageof
diode
-ForwardDCCurrent:approx.1mA
-ReversedDCVoltage:approx.1.5V
-OverloadProtection:250VDCorrmsAC
3.2.6ACVoltageDetect
RangeTEST
Sensitivity
Voltagesensitivity>50V,adjustcontinuously
Frequency50Hz
Distance<150mm(changealongwiththesensitivity)
-Non-contactdetecting
4.OPERATINGINSTRUCTION
4.1
DATA
HOLD
Ifyouneeddataholdwhenmeasuring,youcanputon“DATA-H”button,itwillholdthereading;ifyouput
thebuttonagain,dataholdisnotcontinue.
4.2MAXIMUMVALUEMEASURINGANDHOLD
Attherangeofvoltage,youcanputon“MAX.H”button,itwillholdthemaximumvalue;ifyouputthe
buttonagain,themaximumvaluewillnotbeheld.
4.3FUNCTIONTRANSFORM
Putdownthe"FUNC."whenmeasuringthevoltage.MeterwillbetransformedbetweenDCandAC
range.Put"FUNC."whenmeasuringtheresistance,diodeandcontinuity,meterwilltransformamong
them.
4.4RANGETRANSFORM
Theautorangeisusedwhenmeasuringthevoltageandresistance.Putdownthe"RANGE"ifthe
manualrangeisneeded.Eachtimeyouputdown,rangewillgoupward;theminimumrangeis
transformedif"RANGE"isputdownatthemaximumrange.Ifthe"RANGE"isputdownmorethantwo
seconds,autorangeisusedagain.
4.5AUTOPOWEROFF
Ifthere’snoanyoperationwithinfifteenminutesafterpowerison,meterwillautopoweroffwithfiveshort
soundsandalongsoundinaminute.
Afterautopoweroff,ifstirthetransformswitchorputdownanybuttonof“FUNC.”,
“DATA-H”,”MAX.H”,”RANGE”,meterwillrecovertheworkingcondition.
Ifpressesthe“FUNC.”whenpowerison,autopoweroffdisable.
NOTE:
AttheTESTrange(ACVdetecting),thereisnoautopowerofffunction
4.6PREPARATIONFORMEASUREMENT
4.6.1Setthetransformswitchtotherightrange.Atthemanualrange,whenthevaluescaletobe
4.12.1Rotatetheprobesocketanti-clockwisetospintheprobeintothemeter.
4.12.2Setthetransformswitchatthe
Vrangeposition.
4.12.3Besurethatthedisplayisnot
shown“
”,otherwise,the
batteryshouldbereplaced.
4.12.4Setthetransformswitchto
theTESTrange.ThenthegreenLEDoftheLEDIndicatorisbright.
4.12.5Rotatethesensitivityadjustingknobinthemiddleofthetransformswitchanti-clockwise,setthe
meter
tothehighestdetectingsensitivityinordertoenlargethedetectingrange.
4.12.6Puttheprobesocketclosetotheleadorthepowersocket,IfACelectricalvoltageispresent,the
redLEDIndicatorwhichinfrontofthemeterwillflashandtheaudiblewarningwillsound.
4.12.7Intheplaceswithmanyleadsandjacks,rotatethesensitivityadjustingknobinthemiddleofthe
transformswitchclockwise,setthemetertothelowerdetectingsensitivityinordertoconfirmwhichone
iselectriferous.
NOTE:
-WhenusingACVdetectingfunction,alwayssetthemetertothehighestsensitivity.
-Inthisrange,eventhoughthereisnoanysoundandlightindication,themeterwillstillconsume
electricity.
-Thereisnoautopowerofffunctioninthisrange.
-AlwayssetthepowerswitchtotheOFFpositionwhenthemeterisnotinuse.
5.MAINTENANCE
5.1BATTERYREPLACEMENT
WARNING
Beforeattemptingtoopenthebatterycoverofthemeter,besurethattheprobetipofthe
meterandtestlead(ortestclip)havebeendisconnectedfrommeasurementcircuitto
avoidelectricshockhazard.
5.1.1Ifthesign‘
’
appearsontheLCDdisplay,itindicatesthatthebatteryshouldbereplaced.
5.1.2Loosenthescrewfixingthebatterycoverandremoveit.
5.1.3Replacetheexhaustedbatterywithanewone.
5.1.4Putthebatterycoverasitsorigin.
5.2TESTLEADS(ORTESTCLIP)REPLACEMENT
WARNING
Fullincompliancewithsafetystandardscanbeguaranteedonlyifusedwithtestleads
supplied.Ifnecessary,theymustbereplacedwiththesamemodelorsameelectric
ratings.Electricratingsofthetestleads:600V10A.
Youmustbereplacedthetestleadiftheleadisexposed.
6.ACCESSORIES
⑴
Test
Lead:ElectricRatings600V10Aonepiece
(ortestclip)totheother
side.
4.8.6Youcangetreadingfrom
LCDdisplay.
WARNING
RiskofElectrocution.
Youcan’tinputthevoltagewhichishigherthan600VrmsAC,it’spossibletoshowhigher
voltage,butitmaydamagetheinnercircuitorcauseelectricalshock.
Payattentiontoavoidgettinganelectricshockwhenmeasuringvoltage.
NOTE:
-Atthemanualrangemode,whenonlythefigure‘OL
’
isdisplayed,itindicatesoverrangesituationand
thehigherrangehastobeselected.
-Atthelittlevoltagerange,themeterwillshowunsteadyreadingwhentestleadshaven’treachthecircuit,
it’snormalbecausethemeterisverysensitivity.Whentestleadstouchthecircuit,youcangetthetrue
reading.
-Atthemanualrangemode,whenthevaluescaletobemeasuredisunknownbeforehand,selectthe
rangeatthehighestpositionandsetdowngradually.
-TransformtothemanualrangewhenusethemVrange.
4.9MEASURINGRESISTANCE
4.9.1Rotatetheprobesocketclockwisetospinouttheprobefromthemeter.
4.9.2InserttheblacktestleadortestclipintheCOMjack.
4.9.3Setthetransformswitchatthe(rangeposition.
Autorangeormanualrangecanbe
transformedbyputtingthe“RANGE”.
4.9.4Connecttheprobetipofthe
metertoonesideofthetested
circuitandprobetipofthetest
lead(ortestclip)totheotherside.
4.9.5YoucangetreadingfromLCDdisplay.
WARNING
RiskofElectrocution.
Whenmeasuringin-circuitresistance,besurethecircuitundertesthasallpower
removedandthatallcapacitorshavebeendischargedfully.
NOTE:
-Atthemanualrangemode,whenonlythefigure‘OL
’
isdisplayed,itindicatesoverrangesituationand
thehigherrangehastobeselected.
-Formeasuringresistanceabove1MΩ,themetermaytakeafewsecondstogetstablereading.
-Whentheinputisnotconnected ,i. e.atopencircuit,thefigure‘OL
’
willbedisplayedfortheoverrange
condition.
3.2.1DCVoltage
RangeResolutionAccuracy
200mV0.1mV
2V0.001V
20V0.01V
±(0.7%ofrdg+2digits)
200V0.1V
600V1V
-InputImpedance:10MΩ
-OverloadProtection:200mVrange:250VDCorACrms,
2V-600Vranges:DC600VorAC600Vrms.
-Max.InputVoltage:600VDC
3.2.2ACVoltage
RangeResolutionAccuracy
200mV0.1mV
2V0.001V
±(0.8%ofrdg+3digits)
20V0.01V
200V0.1V
600V1V±(1.0%ofrdg+3digits)
-InputImpedance:10MΩ
-OverloadProtection:200mVrange:250VDCorACrms,
2V-600Vranges:DC600VorAC600Vrms.
-FrequencyRange:40to400Hz
-Response:Average,calibratedinrmsofsinewave.
-Max.InputVoltage:600VrmsAC
3.2.3Resistance
RangeResolutionAccuracy
200Ω0.1Ω
±(1.0%ofrdg+3digits)
2kΩ0.001kΩ
20kΩ0.01kΩ±(1.0%ofrdg+1digit)
200kΩ0.1kΩ
2MΩ0.001MΩ
20MΩ0.01MΩ
±(1.0%ofrdg+5digits)
-OpenCircuitVoltage:0.25V
-OverloadProtection:250VDCorrmsAC
3.2.4Continuity
RangeFunction
Built-inbuzzerwillsound,ifresistanceislowerthan50(.
-Opencircuitvoltage:approx.0.5V
-OverloadProtection:250VDCorrmsAC
3.2.5Diode
4.10TESTINGDIODE
4.10.1Rotatetheprobesocketclockwisetospinouttheprobefromthemeter.
4.10.2InserttheblacktestleadortestclipintheCOMjack.
4.10.3Setthetransformswitchatthe
rangeposition.
4.10.4putdownthe"FUNC."transformedat
test.
4.10.5Connecttheprobetipofthemetertotheanodeofthediode,
theblacktestlead(ortestclip)tothecathodeofthediode.
4.10.6YoucangetreadingfromLCDdisplay.
NOTE:
-Themeterwillshowthe
approximateforwardvoltage
dropofthediode.
-Ifthemeterandtheleadconnectionisreversed,onlyfigure‘OL
’
willbedisplayed.
-Whentheinputisnotconnected ,i. e.atopencircuit,thefigure‘OL
’
willbedisplayed.
4.11CONTINUITYTEST
WARNING
RiskofElectrocution.
Whentestingthecircuitcontinuity,besurethatthepowerofthecircuithasbeenshut
downandallcapacitorshavebeendischargedfully.
4.11.1Rotatetheprobesocketclockwisetospinouttheprobefromthemeter.
4.11.2InserttheblacktestleadortestclipintheCOMjack.
4.11.3Setthetransformswitch
atthe
rangeposition.
4.11.4Putdownthe"FUNC."
transformedat
continuitytest.
4.11.5Connecttheprobetipof
themetertoonesideofthetestedcircuitandprobetipofthetestlead(ortestclip)totheotherside.
4.11.6Ifcontinuityexists (i. e.,resistancelessthanabout50Ω),built-inbuzzerwillsound.
NOTE:
-Iftheinputopencircuit(orthecircuitresistancemeasuredishigherthan200Ω),thenthefigure‘0L
’
will
bedisplayed.
4.12ACVOLTAGEDETECT
WARNING
RiskofElectrocution.
Whendetectingpayattentiontoavoidgettinganelectricshock.
Beforeusingtocheckforvoltageinanoutlet,alwaystestthemeteronaknownlive
circuittoverifythattheACvoltagedetectfunctionofthemeterisworkingproperly.
keepfingersbehindtheprobebarrierwhilemeasuring.
measuredisunknownbeforehand,selectthehighestrange.
4.6.2Whenmeasuring,atfirst,connecttothepublic(COM)testingline,thenconnecttheprobetipofthe
metertothecircuitundertest.
4.6.3Ifthebatteryvoltageislessthan2.4V,displaywillshow“
”,thebatteryshouldbechangedatthis
time.
4.7DCVOLTAGEMEASURING
WARNING
RiskofElectrocution.
Youcan’tinputthevoltagewhichishigherthan600VDC,it’spossibletoshowhigher
voltage,butitmaydamagetheinnercircuitorcauseelectricalshock.
Payattentiontoavoidgettinganelectricshockwhenmeasuringhighvoltage.
4.7.1Rotatetheprobesocketclockwisetospinouttheprobefromthemeter.
4.7.2InserttheblacktestleadortestclipintheCOMjack.
4.7.3Setthetransformswitchatthe
V
rangeposition.
4.7.4Pressthe"FUNC."Button
totransformtoDCmeasurement.
Autorangeandmanualrange
canbetransformedby
pressingthe“RANGE”
button.
4.7.5Connecttheprobetipofthemeterandprobetipofthetestlead(ortestclip)acrossthepower
sourceorbeloadedonthetwosidesundermeasurement.
4.7.6YoucangetareadingfromLCDdisplay.Thepolarityofthetestedterminalwhichthetipofthe
meterconnectionwillbeindicated.
NOTE:
-Atthelittlevoltagerange,themeterwillshowunsteadyreadingwhentestleadshaven’treachthecircuit,
it’snormalbecausethemeterisverysensitivity.Whenmetertouchthecircuit,youcangetthetrue
reading.
-Atthemanualrangemode,whenonlythefigure‘OL
’
isdisplayed,itindicatesoverrangesituationand
thehigherrangehastobeselected.
-Atthemanualrangemode,whenthevaluescaletobemeasuredisunknownbeforehand,selectthe
rangetothehighestpositionandsetdowngradually.
4.8MEASURINGACVOLTAGE
4.8.1Rotatetheprobesocketclockwisetospinouttheprobefromthemeter.
4.8.2InserttheblacktestleadortestclipintheCOMjack.
4.8.3SetthetransformswitchattheVrangeposition.
4.8.4Autorangeandmanualrangecanbetransformedbyputtingthe“RANGE”.
4.8.5Connecttheprobetipofthemeter
toonesideofthetestedcircuit
andprobetipofthetestlead
...
Thebatteryisnotsufficientforproperoperation.
1.4MAINTENANCE
1.4.1Pleasedonotattempttoadjustorrepairthemeterbyremovingtherearcasewhilevoltageisbeing
WARNING
BEEXTREMELYCAREFULINTHEUSEOFTHISMETER.Improperuseofthisdevice
canresultinelectricshockordestroyofthemeter.Followallsafeguardssuggestedinthis
manualandthenormalsafetyprecautionsusedinworkingwithelectricalcircuits.
Donotservicethisdeviceifyouarenotqualifiedtodoso.
To
ensuresafeoperation,andinordertoexploittothefullthefunctionalityofthemeter,
pleasefollowthedirectionsinthissectioncarefully.
ThismeterhasbeendesignedaccordingtoIEC-1010concerningelectronicmeasuringinstrumentswith
anovervoltagecategoryCATⅢ600Vandpollution2.
Followallsafetyandoperatinginstructionstoensurethatthemeterisusedsafelyandiskeptingood
operatingcondition.
Withproperuseandcare,thedigitalmeterwillgiveyouyearsofsatisfactoryservice.
1.1PRELIMINARY
1.1.1Whenusingthemeter,theusermustobserveallnormalsafetyrulesconcerning:
-Protectionagainstthedangersofelectricalcurrent.
-Protectionofthemeteragainstmisuse.
1.1.2Whenthemeterisdelivered,checkthatithasnotbeendamagedintransit.
1.1.3Whenpoorconditionunderharshpreservationorshippingconditionscaused,inspectandconfirm
thismeterwithoutdelay.
1.1.4Beforeusingtocheckforvoltage,alwaystestthemeteronaknownlivecircuittoverifythatthe
detectfunctionofthemeterisworkingproperly.
1.1.5
Test
leadortestclipmustbeingoodcondition.Beforeusingverifythattheinsulationontestleador
testclipisnotdamagedand/ortheleadswireisnotexposed.
1.1.6Fullcompliancewithsafetystandardscanbeguaranteedonlyifusedwithtestleadssupplied.
Ifnecessary,theymustbereplacedwiththesamemodelorsameelectricratings.
User'sManual
SinoMeter ...
Thebatteryisnotsufficientforproperoperation.
1.4MAINTENANCE
1.4.1Pleasedonotattempttoadjustorrepairthemeterbyremovingtherearcasewhilevoltageisbeing
WARNING
BEEXTREMELYCAREFULINTHEUSEOFTHISMETER.Improperuseofthisdevice
canresultinelectricshockordestroyofthemeter.Followallsafeguardssuggestedinthis
manualandthenormalsafetyprecautionsusedinworkingwithelectricalcircuits.
Donotservicethisdeviceifyouarenotqualifiedtodoso.
To
ensuresafeoperation,andinordertoexploittothefullthefunctionalityofthemeter,
pleasefollowthedirectionsinthissectioncarefully.
ThismeterhasbeendesignedaccordingtoIEC-1010concerningelectronicmeasuringinstrumentswith
anovervoltagecategoryCATⅢ600Vandpollution2.
Followallsafetyandoperatinginstructionstoensurethatthemeterisusedsafelyandiskeptingood
operatingcondition.
Withproperuseandcare,thedigitalmeterwillgiveyouyearsofsatisfactoryservice.
1.1PRELIMINARY
1.1.1Whenusingthemeter,theusermustobserveallnormalsafetyrulesconcerning:
-Protectionagainstthedangersofelectricalcurrent.
-Protectionofthemeteragainstmisuse.
1.1.2Whenthemeterisdelivered,checkthatithasnotbeendamagedintransit.
1.1.3Whenpoorconditionunderharshpreservationorshippingconditionscaused,inspectandconfirm
thismeterwithoutdelay.
1.1.4Beforeusingtocheckforvoltage,alwaystestthemeteronaknownlivecircuittoverifythatthe
detectfunctionofthemeterisworkingproperly.
1.1.5
Test
leadortestclipmustbeingoodcondition.Beforeusingverifythattheinsulationontestleador
testclipisnotdamagedand/ortheleadswireisnotexposed.
1.1.6Fullcompliancewithsafetystandardscanbeguaranteedonlyifusedwithtestleadssupplied.
Ifnecessary,theymustbereplacedwiththesamemodelorsameelectricratings.
User'sManual
SinoMeter...
- 11
- 382
- 0

Digital Communications I: Modulation and Coding Course
Ngày tải lên :
18/10/2013, 06:15
... SRRQ
Non-ideal channel
One-tap DFE
)(3.0)()( Tttth
c
−+=
δδ
Matched filter outputs at the sampling time
ISI-no noise,
No equalizer
ISI-no noise,
DFE equalizer
ISI- noise
No equalizer
ISI- noise
DFE ... filters
)(
)()(
fj
cc
c
efHfH
θ
=
Non-constant amplitude
Amplitude distortion
Non-linear phase
Phase distortion
Lecture 6 27
Equalization – cont’d
Equalization using
MLSE (Maximum likelihood sequence
estimation)
Filtering
Transversal ... 19
Equalization – cont’d
Frequency
down-conversion
Receiving
filter
Equalizing
filter
Threshold
comparison
For bandpass signals
Compensation for
channel induced ISI
Baseband pulse
(possibly distored)
Sample
(test...
- 30
- 469
- 0


ABB Drives User’s Manual Digital I/O Extension FIO-01
Ngày tải lên :
20/10/2013, 02:15
... 2
2RO2COM
3RO2NC
Overview
11
Overview
Overview
This chapter contains a short description of the FIO-01 Digital I/ O
Extension.
The FIO-01 Digital I/ O Extension module
The FIO-01 is a general purpose digital input/output ... layout
STATUS
RO1NO
RO1COM
RO1NC
X65
X64
COM
DIO4
RO2NO
RO2COM
RO2NC
X66
X63
COM
DIO3
X62
COM
DIO2
X61
COM
DIO1
321 321
21212121
CHASSIS
DIGITAL IO EXTENSION
FIO-01
Diagnostic-LED
Electromechanical
relays
digital I/ O
Fixing screw
Installation
16
Programming
The communication between ... drive are
switched off.
In addition to conventional installation tools, have the drive
manuals available during the installation as they contain important
information not included in this manual. ...
- 22
- 683
- 0

DIGITAL DATA TRANSMISSION - I
Ngày tải lên :
19/10/2013, 17:15
... 11
II. ASK Transmission (on-off Keying)
The circuit is build as shown in figure below. The input sine wave is multiplied by a
pulse generator, which can be used as a digital data bit.
Figure ... transmitted on a RF
carrier by use of amplitude, phase or frequency modulation. For digital amplitude
modulation, it is known as Amplitude Shift Keying. Here, the carrier amplitude is determined ...
Limiter:
This is the decision-making device. If the output of the integrator is grater than zero, the
limiter output is about +2.5 V. The choice of zero as a threshold voltage is valid since...
- 14
- 344
- 0

Tài liệu LabVIEW Basics I Course Manual P2 pptx
Ngày tải lên :
13/12/2013, 01:15
... as
(Windows)
Notepad,
WordPad,
(Macintosh)
TeachText,
(UNIX)
Text Editor, vi, or vuepad
❑ LabVIEW Basics II course disk, containing the following files.
Filename Description
LVB2SW.exe
Self-extracting archive containing VIs ... State Machine VI architecture is
a method for controlling the execution of VIs in a nonlinear fashion. This
programming technique is very useful in VIs that are easily split into several
simpler ... Instruments Corporation 1-17 LabVIEW Basics II Course Manual
Exercise 1-2 Verify Information VI
Objective: To build a VI that demonstrates the simple VI architecture.
You will build a VI that accepts...
- 282
- 448
- 1

Tài liệu LabVIEW Basics I Course Manual P1 pptx
Ngày tải lên :
13/12/2013, 01:15
... during the course
and for doing certain course exercises
basics1.llb
VI library containing subVIs used during the course
nidevsim.zip
Zip file containing the LabVIEW instrument driver
for the NI ... as
(Windows)
Notepad,
WordPad,
(Macintosh)
TeachText,
(UNIX)
Text Editor, vi, or vuepad
❑ LabVIEW Basics I course disks, containing the following files.
Filename Description
Disk 1
LV Basics I
Directory for saving VIs created ... 1 Introduction to LabVIEW
© National Instruments Corporation 1-7 LabVIEW Basics I Course Manual
1 Toolbar
2 Owned Label
3 Digital Numeric Control
4 Free Label
5 Digital Numeric Control Terminal
6...
- 388
- 472
- 1

Tài liệu Hướng dẫn sử dụng máy ảnh kỹ thuật số Canon Ixus 100 is pptx
Ngày tải lên :
23/12/2013, 05:17
... .
–ffOsroloCyM
Vivid
Neutral
Sepia
B/W
Positive Film
Lighter Skin Tone
Darker Skin Tone
Vivid Blue
Vivid Green
Vivid Red
Custom Color
•
•
Trên màn hình hin th ch đ đã chn.
Không th c i đt tông màu hai ... Giờ
Đính kèm ngày gi vào hình nh thiu ngày gi.
S dng chc năng in DPOF.
Kt n i máy nh v i máy in và in.
S dng phn mm i kèm.
44
Sau khi chp xong, chn l i ch đ .
–ffOsroloCyM
Vivid
Neutral
Sepia
B/W
Positive ... c i đt t i ưu nht khi chp.
Bao gm màu
xanh
da tr i
Gray (Xám) Light Blue
(Xanh nht)
mt v i i u kin chp, biu tưng hin th trên màn hình s không khp
v i cnh chp. Đc bit...
- 66
- 3.3K
- 8


Tài liệu Hướng dẫn sử dụng Canon IXUS 860is ppt
Ngày tải lên :
21/01/2014, 15:20
... in.)
In kh bưu thip
148 × 100 mm (6 × 4 in.)
In kh L
119 x 89 mm (4.7 × 3.5 in.)
In kh A5
G i qua e-mail hoc khi mun
chp nhiu hình.
i m nh
i m nh
i m nh
i m nh
i m nh
i m nh
Độ ... trc tip [Picbridge], cho phép kt n i máy nh
v i các dòng máy in hiu Canon có cùng chc năng [Picbridge].
*2 Có th s dng các lo i th in CP-10/CP-100/CP-200/CP-300.
Các dòng máy hiệu Canon
Dòng ... hơn). V i cùng dung lưng, cho phép quay v i th i
gian gn gp đ i.
*3 T l khung hình khi ngng quay:
- : 1 khung hình/giây (th i gian ngng quay: 1 giây).
- : 0.5 khung hình/giây (th i gian...
- 58
- 763
- 1


Tài liệu Hướng dẫn sử dụng Canon IXUS 960is pptx
Ngày tải lên :
21/01/2014, 15:20
... vào một th i i m trong
suốt th i gian quay.
- Th i gian quay t i đa: 2 tiếng.
Kích cở t i đa:
4
GB*
2
/ đoạn phim
In ҩn
15
- Biểu tượng sẽ nhấp nháy khi ảnh đang được in.
2.
Mở máy in.
3.
Mở ... PIXMA
Dòng máy in phun
Các dòng máy hiệu Canon
Cáp kết n i
Khe cắm dây cáp n i máy tính
(a)
1. Mở máy in sau đó kết n i v i camera qua cổng kết n i trực tiếp
(b)
DESIGNED BY LE BAO MINH JOIN ... In ấn
14
In Ấn
Việc in ấn sẽ được thực hiện một cách dễ dàng sau khi kết n i camera v i một
máy in tương thích bằng dây cáp và nhấn phím in.
Phím xem l i
Phím in
Dòng máy SELPHY
Máy in ảnh...
- 55
- 1.4K
- 3

Tài liệu Hướng dẫn sử dụng Canon PowerShot G9 - Phần I ppt
Ngày tải lên :
26/01/2014, 12:20
... năng in ảnh trực tiếp [Picbridge], cho phép kết n i máy ảnh
v i các dòng máy in hiệu Canon có cùng chức năng [Picbridge].
*2 Có thể sử dụng các lo i thẻ in CP-10/CP-100/CP-200/CP-300.
Phím in ... NHANH
Ba
s
ic
DESIGNED BY LE BAO MINH JOIN STOCK CORP, 2007
Vui lòng đọc hướng dẫn trước khi sử dụng
Sách này gi i thích những tính năng cơ bản nhất khi sử dụng máy ảnh
33 Thay đ i độ phân gi i
Khi c i ... [Color Swap].
- C i đặt m i cho máy.
16 In Ấn
Getting Started
Hướng Dẫn Cách In Ảnh
1.
Kết n i máy ảnh v i máy in.
- Mở nắp đậy bảo vệ và cắm dây cáp kết n i qua cổng kết n i
(hình dư i) .
*1 Dòng...
- 36
- 3.4K
- 30